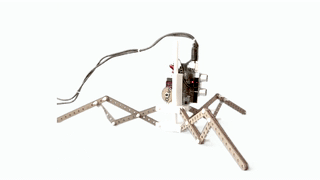
The first part of the exercise was based in the exploration of Kinematic systems. This was achieved by dissecting an umbrella, understating the basic workings of it and designing your own system to propel your Sheikhabot. The focus of the second part of this module is to make your kinematic system or robot interactive. This will be achieved by using a set of sensors and actuators combined with the Arduino micro-controller that will help you bring life to your robot.
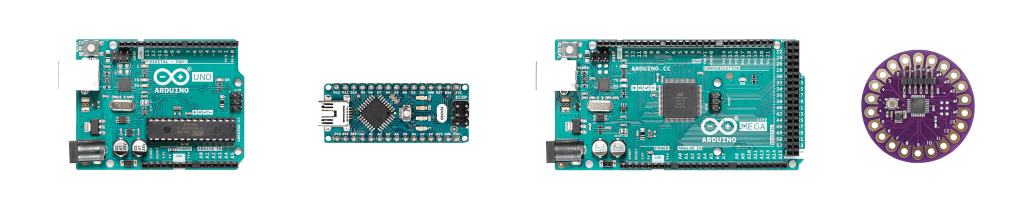
To better understand what Arduino is and how it works, it’s essential that you go through the first 4 tutorials in the book that was also shared at the beginning of the semester, you can also find a lot of video tutorials on YouTube. More importantly, you can learn the basics of coding and processing by following the tutorials on LearnProcessing.
Assignment
Please watch the assignment tutorial which will take you through this exercise.
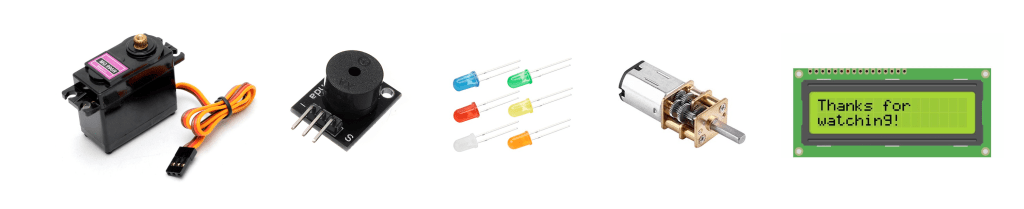
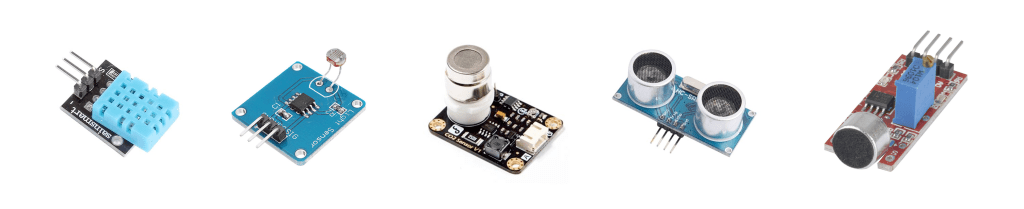
The main objective is to render your robot interactive and autonomous using 3 different sensors and actuators. You have been asked to procure the 37 Sensors at the beginning of the semester. Please find some references and tutorials to some of the sensors that you have in you kit following this link.
After familiarizing yourself with some introduction tutorials to Arduino, watch the tutorials below to complete the exercise.
- Connecting the Servo to the Arduino (Min 19:48) Already covered in Kinetic Systems in Step 2.
- The Basics of the Photoresistor – Light Sensor
- Controlling the Sheikhabot using the Distance Sensor (IMPORTANT) as it also explains conditionals.
- Reading Data from your sensors
- The Basics of a temperature sensor
3 Actuators
- The actuators should work in parallel.
- Example: your bot moves, changes LED color, and makes a noise at the same time when it senses something. The actuators in this case are the servo, LED, and a buzzer.
- The use of the servo as an actuator is mandatory as it is meant to animate and move your robot. You have been asked at the beginning of the semester to procure the MG995 servo for that purpose. For the remainder two actuators select any of the ones available in your kit or order additional ones, to add extra functionalities to your robot. (e.g. using an additional servo to point at something or to push your robot in a certain way, or a wi-fi module to send a tweet or post something online).
3 Sensors
- The sensors can also work in parallel, however doing so is not mandatory.
- Example: Your robot can only operate under certain conditions, e.g. only if it’s dark, when you get close to it, under a certain noise condition. The sensors in this case are light sensor, distance or obstacle sensor and a microphone. The latter 3 senses however can be demonstrated separately.
Autonomy
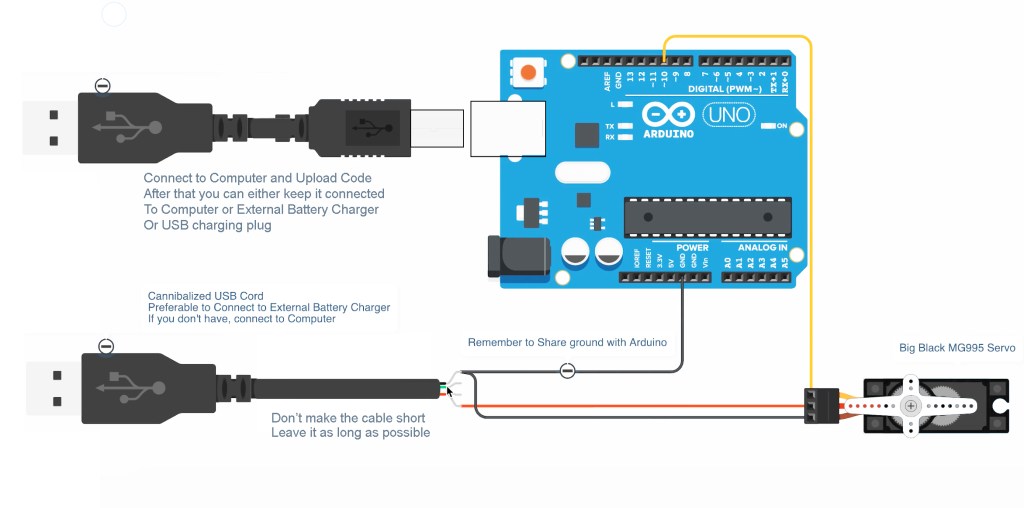
In order to obtain an autonomous kinematic robot capable of interacting with its surroundings without an umbilical cord (USB cable) it’s essential to power-up your system with a dedicated power source (External USB charger) as show in the previous phase by cannibalizing a USB cable. You can connect both the servo and the Arduino to the external power source once you upload your code. The sensors will be connected directly to Arduino, where your power hungry Servomotors will require an additional external power-source to reduce load and risk on the Arduino itself.
Submission
Publish the content below both on your blog and Moodle by 17th of April 2021 – 23:59.
- Video
- Prepare 3 separate videos of your Sheikhabot demonstrating the interaction in a neutral environment (white background photo-shoot setup). In all 3 videos you will have your 3 chosen actuators, what will vary though, are the 3 distinct sensors. E.g. In the first video you can animate your robot with sound, in the second with distance, in the third with light. You are allowed to use all 3 sensors together as well
 | | |
- Code
- Make sure that your cite the source of your code, and you comment every part of it with your name, your evaluation depends on it. Submit the code file together with a screenshot of it.

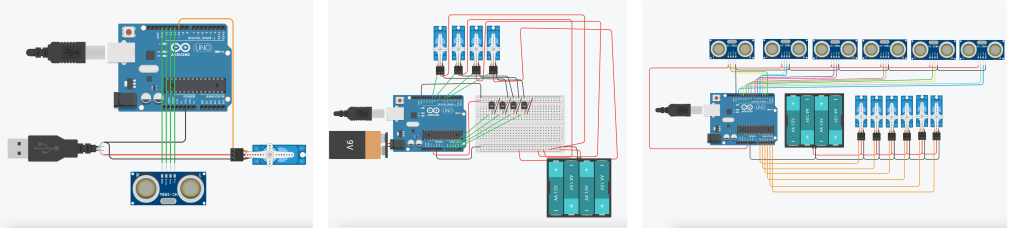
- Circuitry
- Use TinkerCad (Circuitry) for each of your 3 iterations to show how your sensors and actuators are connected to Arduino and submit them as well.
Important Notes
- The submission needs to occur on your blog, as well on moodle by uploading the files of the 3 videos, 3 code files, 3 screenshots of the codes, and the 3 circuitry images respecting the naming process(Name_Surname_Filename..), all in a zip file.
- Make sure the videos of the robot interaction are high quality and taken on a white or neutral background. You can use a colored background under a good lighting condition (green or blue) and use a video post processing tool such as Adobe After Effects or Final Cut pro to remove the background an insert a neutral color.
- You are welcome to customize your robot system to facilitate the addition of the sensors and actuators to it. (e.g. 3d printing supports for the needed add-ons, you need to book Fab Lab time in advance and prepare your G-Code files.)
- Make sure your robots are well designed and the sensors are well anchored as it’s very likely that they will be used in several exhibitions.
Evaluation
- The evaluation will be based on the intricacy and novelty of the interaction in combination with the choice of sensors as well as actuators.
- The codes provided in the tutorials above are for instructional use only, It’s essential to modify them and adapt them to fit your robots needs.
- Make sure that you cite the source of your code if it’s taken from the internet, and you comment on every part of it. Make sure to add your name. It’s essential that any code taken from other sources are modified and not used as is (copy-pasted).
